 Save to Pinterest
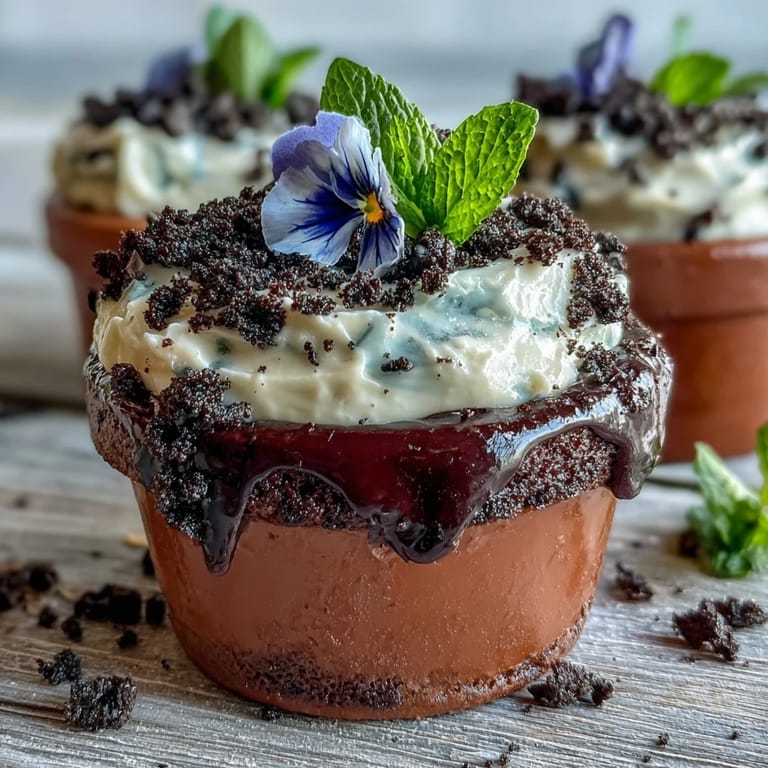
 The first time I made these flower pot brownies, the kitchen was filled with the scent of melted butter and chocolate, and my hands were dusted with cocoa and cookie crumbs before I'd even realized it. The idea struck me not from a cookbook, but listening to my neighbor describe a garden-themed birthday party for her little one. Something about the image of edible soil and delicate edible blossoms made me grin — and I couldn't resist testing the idea for Mother's Day. Whimsical, playful, and just a little bit magical, these desserts are as fun to make as they are to eat. I still remember nervously checking the oven, hoping my mini flower pots wouldn't betray me with cracks (thankfully, they didn't.).
I once brought a batch to my mom's backyard on a breezy spring day, where she caught me using pansies from her garden. She pretended to scold me for raiding her flower beds, but then asked for a second brownie anyway. We ended up sharing the leftover mint over tea while debating which edible flowers tasted best with chocolate. I love how these brownies turned into a centerpiece, sparking laughter between bites. Even my dad, who claims to avoid sweets, ate every last 'shovel' of soil out of his pot.
Ingredients
- Unsalted butter: Melting this gently keeps brownies moist; I always skip salted butter to control flavor.
- Granulated sugar: It gives the brownies that crackly top and the right chew.
- Eggs: Room temperature eggs blend more smoothly; brisk whisking is key for fudgy texture.
- All-purpose flour: Don't overmix, or your brownies might go cakey instead of fudgy.
- Unsweetened cocoa powder: Go for a good Dutch-process if you can; it really deepens the chocolate note.
- Baking powder: Just half a teaspoon lifts the brownies without making them fluffy.
- Salt: A pinch brings out the chocolate flavor perfectly.
- Vanilla extract: Adds warmth and rounds out the chocolate.
- Oreo cookies: I crush mine with the filling; the creamy centers make the 'dirt' clump like real soil.
- Heavy cream: Cold cream whips up fastest; use chilled tools for the best peaks.
- Powdered sugar: Sift it straight into the cream so your whipped topping stays light.
- Edible flowers or colorful gummies: Always double check they're food-safe; violets and pansies are personal favorites.
- Fresh mint leaves (optional): If you're feeling gardeny, these add a perfect bright finish.
Tired of Takeout? 🥡
Get 10 meals you can make faster than delivery arrives. Seriously.
One email. No spam. Unsubscribe anytime.
Instructions
- Prep the Flower Pots:
- If using oven-safe pots, line the bottom with parchment; otherwise, set up a lined baking pan for easy brownie removal later.
- Melt and Mix:
- Gently melt butter until it smells nutty, then whisk in sugar and vanilla until smooth and glossy.
- Add Eggs:
- Crack in the eggs one by one, whisking after each so the batter feels satiny in your bowl.
- Combine Dry Ingredients:
- Sift flour, cocoa, salt, and baking powder together, then fold them into your wet mixture with a slow hand—just until combined.
- Fill and Bake:
- Spoon batter into 6 mini pots (or your tray), filling each about halfway. Bake at 175°C (350°F) for about 22 minutes, checking for moist crumbs on a toothpick.
- Cool Completely:
- Let pots cool—if you're impatient like me, pop them onto a rack, but resist the urge to decorate while warm.
- Make Oreo Dirt:
- Crush cookies (cream included) in a food processor, or bash them in a bag with a rolling pin until fine and earthy.
- Whip the Cream:
- With a cold bowl and mixer, whip cream and powdered sugar until thick, holding billowy peaks.
- Assemble Layers:
- If you baked in a tray, nestle brownie pieces into the bottoms of cleaned pots.
- Cream and Dirt:
- Spread a dollop of whipped cream on top, then mound Oreo crumbs so it truly looks like fresh soil.
- Decorate Your Garden:
- Add edible flowers, a sprig of mint, and maybe a gummy worm for flair. Press flowers gently so they stand upright.
- Chill and Serve:
- Keep pots chilled until ready—these are just as good after an hour in the fridge, maybe better.
 Save to Pinterest
 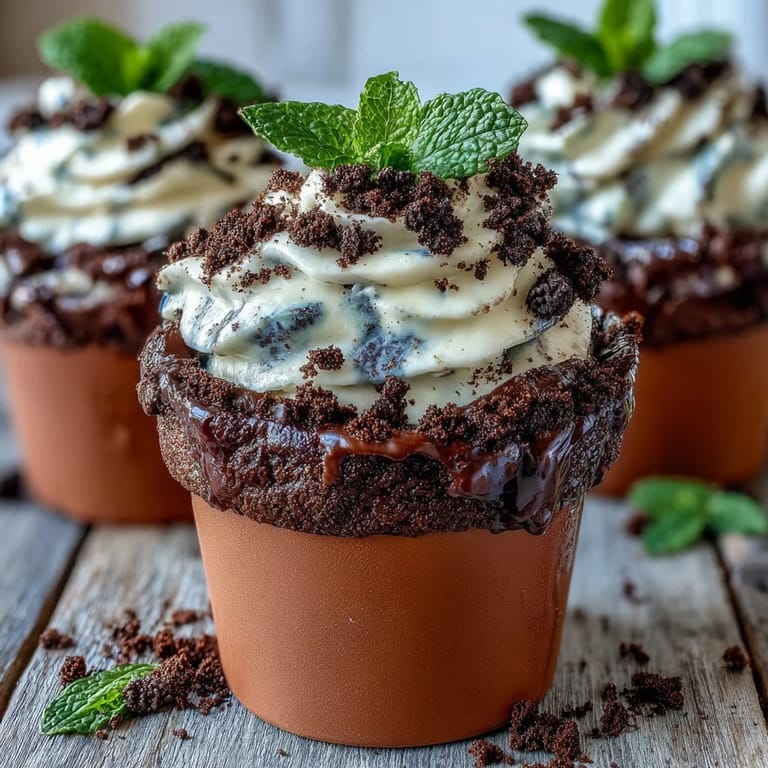 Save to Pinterest
 My youngest niece once insisted on watering each pot with a tiny toy watering can before tasting. At that moment, dessert became a tiny garden party, and everyone wanted to take their flower pot home as a keepsake. There was laughter as fingers got dusty with Oreo soil and a few accidental smudges ended up on noses. Something about sharing these playful desserts shifted the mood, making us a little less serious for the evening. Every time I see a mini flower pot, I want to make them all over again.
Making It Ahead for Busy Holidays
After a few rushed mornings, I learned the brownies are perfect for prepping the night before. Keep the layers separate until you assemble, so each piece stays fresh and the flowers perky. You can also crush Oreos a couple of days early and store them in a sealed jar. Just remember not to whip the cream more than four hours before serving; it loses shape if it sits too long.
Choosing and Using Edible Flowers
Finding food-safe edible flowers became my mini adventure, and I always check with local farmers or the grocer. Pansies, violets, and nasturtiums add a gentle pop of color and hold up well atop the whipped and crumb layers. If you're unsure, stick to mint leaves for something herbal and crowd-pleasing. Give flowers a very gentle rinse and dry them carefully to keep them beautiful.
Troubleshooting and Creative Twists
I once swapped half the cocoa powder for melted chocolate, which made the brownies extra dense and rich, though slightly harder to cut neatly. Adding nuts or mini chocolate chips is a quick upgrade for texture lovers. If you can't find flower pots, ramekins or paper cups work, though the surprise factor isn't quite the same.
- Let guests decorate their own for extra fun and less prep stress.
- You can sneak a coffee soak into the brownie for grown-up flavor.
- For easy cleanup, line the flower pots with parchment circles before baking.
 Save to Pinterest
 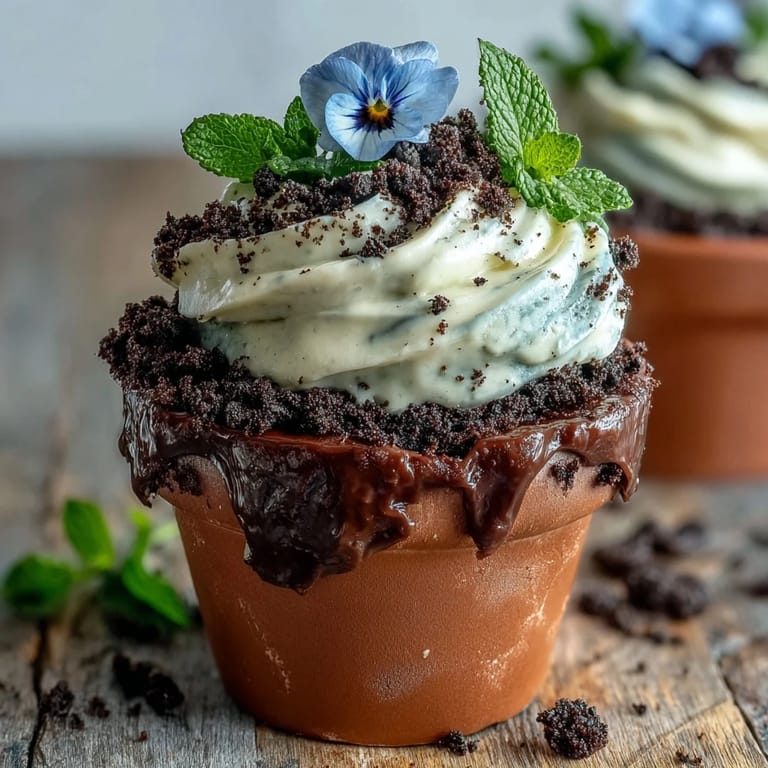 Save to Pinterest
 There’s a certain delight in serving dessert that’s both edible and a conversation starter. However you decorate them, these flower pot brownies are sure to bring a whimsical smile to your table.
Recipe FAQs
- → Can I bake the brownies in a tray instead of pots?
Yes. Bake in a lined baking tray, cool completely, then cut rounds or squares to fit inside mini pots or ramekins. This is helpful if you don't have oven-safe pots.
- → How do I get fudgy brownie texture?
Remove from oven when a toothpick comes out with moist crumbs, avoid overbaking, and use the specified butter-to-flour ratio. Cooling fully helps the texture set without drying out.
- → What's the best way to make the Oreo 'dirt'?
Pulse whole Oreos (with filling) in a food processor until fine crumbs form, or place cookies in a sealed bag and crush with a rolling pin for a rustic texture that resembles soil.
- → How do I stabilize the whipped cream topping?
Chill the bowl and whisk, then whip heavy cream with powdered sugar to stiff peaks. For extra stability, fold in a small amount of cream cheese or use a bit of gelatin if needed for longer holds.
- → Are edible flowers safe to use?
Only use flowers labeled as food-safe from reputable suppliers or farmers' markets. Wash gently and remove any stems if necessary; alternatively, use gummy candies or mint leaves for decoration.
- → Can I make components ahead of time?
Yes. Brownies and Oreo crumbs can be prepared a day ahead and stored airtight. Whip cream just before assembly for best texture, then assemble and chill until serving.