 Save to Pinterest
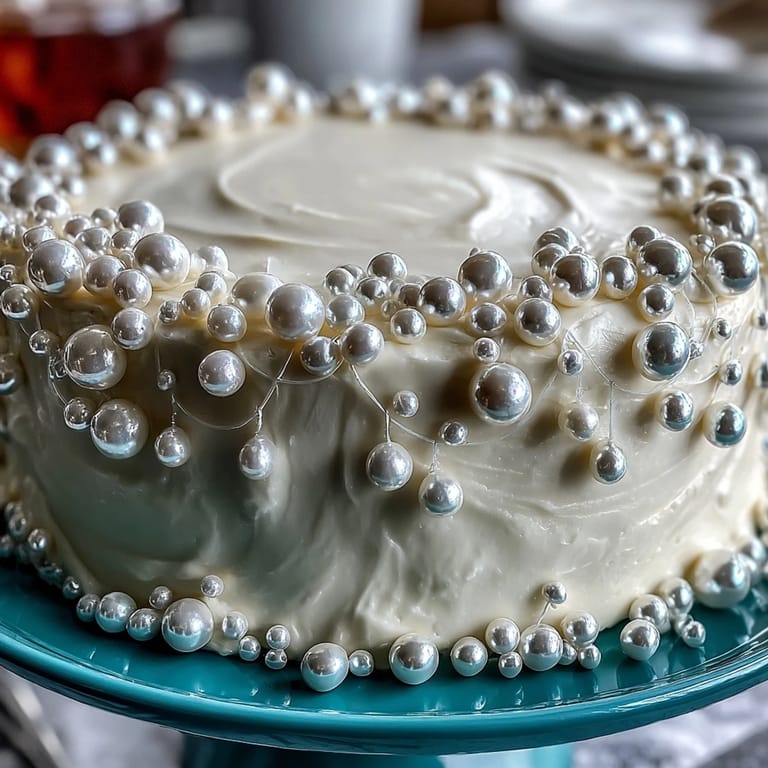
 My cousin's daughter turned seven last spring, and I volunteered to make her Communion cake without really thinking through the logistics. Standing in my kitchen at midnight, fondant in hand and pearl dust everywhere, I realized this wasn't just another dessert—it was the centerpiece of a day she'd remember forever. That's when I understood why this cake matters: it's elegant enough to photograph beautifully, but tender enough that everyone actually wants to eat it, not just admire it from a distance.
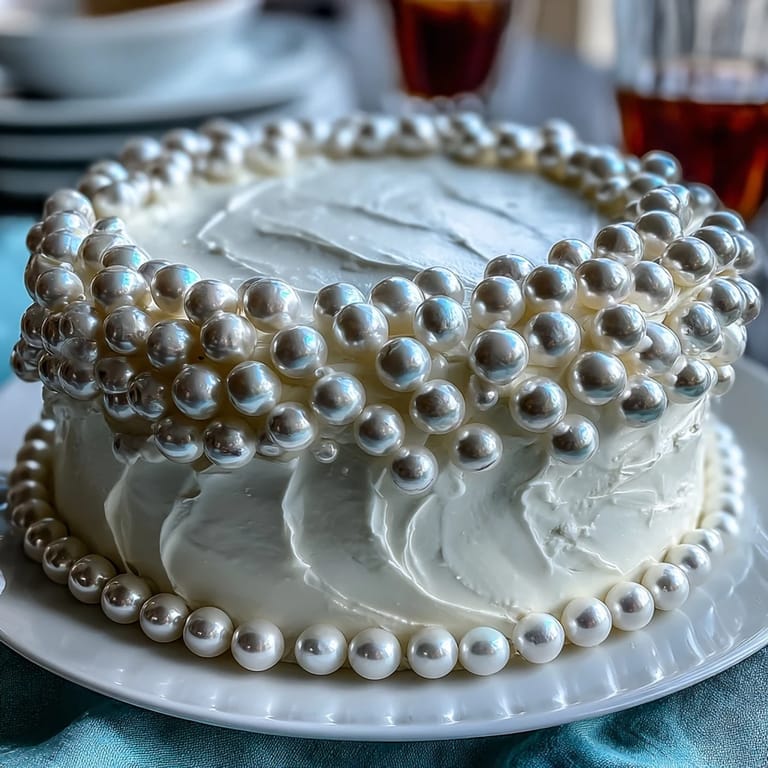
I'll never forget watching my aunt cut into that cake at the reception, how the fondant held its shape perfectly and the pearl dust caught the light just right. My cousin asked me to make her sister's Communion cake too, which meant I'd finally cracked the code on fondant application—turns out the secret is patience and a cooled cake, not fancy tools or hours of practice.
Ingredients
- All-purpose flour (3 cups): This is your structure, and measuring by weight instead of volume gives you a more tender crumb every single time.
- Baking powder (2½ tsp): Don't skip the sifting step; lumps mean uneven rise and dense patches that no one wants.
- Granulated sugar (2 cups): Creaming this with butter until it looks like wet sand is non-negotiable if you want that cloud-like texture.
- Unsalted butter (1 cup plus 1 cup for buttercream): Room temperature is everything here—cold butter won't incorporate properly and you'll end up with a grainy crumb.
- Eggs (4 large, room temperature): Cold eggs break the emulsion, so pull them out of the fridge while your oven preheats.
- Vanilla extract (1 tbsp plus 1 tsp): Pure vanilla makes a noticeable difference in flavor, especially when the cake is this simple.
- Whole milk (1¼ cups): The liquid keeps this cake tender and prevents it from drying out during storage.
- Powdered sugar (4 cups for buttercream): Always sift it, and yes, it matters.
- White ready-to-roll fondant (2 lbs): Having this pre-made saves hours and produces a smoother finish than homemade.
- Pearl luster dust: A tiny amount goes far—use a dry brush and build the shimmer gradually so it looks intentional, not overdone.
- Edible pearls or sugar pearls: These add dimension and elegance, but they're optional if you want to keep decorating minimal.
Tired of Takeout? 🥡
Get 10 meals you can make faster than delivery arrives. Seriously.
One email. No spam. Unsubscribe anytime.
Instructions
- Prepare your pan and preheat:
- Grease your half-sheet pan generously, then line it with parchment paper so you can lift the cooled cake out without any sticking drama. Getting your oven to 350°F beforehand means your batter goes into consistent heat, which is when the magic starts.
- Mix the dry ingredients:
- Whisk flour, baking powder, and salt together in a bowl and set it aside—this prevents lumps and ensures the leavening distributes evenly. Whisking by hand for just thirty seconds does the job perfectly.
- Cream butter and sugar until fluffy:
- This step takes about three minutes and is where your cake gets its tender crumb. You're incorporating tiny air bubbles that create lift, so don't rush this part even if it feels like nothing's happening at first.
- Add eggs one at a time:
- Beat well after each egg so it fully incorporates before adding the next one. This gradual approach keeps the batter smooth and prevents that curdled look.
- Alternate wet and dry ingredients:
- Start with flour, then milk, then flour again—this technique prevents overmixing, which would develop gluten and make your cake tough. Stir just until combined, stopping as soon as you don't see dry flour.
- Bake until golden:
- Pour into your prepared pan and smooth the top gently with a spatula. Bake for 30-35 minutes; when a toothpick comes out clean, it's done—don't bake past this point or you'll dry it out.
- Cool with intention:
- Let the cake rest in the pan for ten minutes so the structure sets, then turn it out onto a wire rack to cool completely. Complete cooling is essential before you frost and fondant, or everything will slide off.
- Make your buttercream:
- Beat softened butter until creamy, then gradually add sifted powdered sugar so lumps don't form. The milk and vanilla create a smooth, spreadable texture that holds the fondant perfectly.
- Frost the entire cake:
- Apply a thin, even layer of buttercream to the top and sides—this is the glue that holds your fondant in place. Use an offset spatula and take your time; a smooth base makes fondant application ten times easier.
- Roll and apply fondant:
- Dust your work surface with powdered sugar, then roll fondant to about an eighth-inch thickness. Drape it over the cake gently and smooth it with your hands or a fondant smoother, working from the center outward to avoid air bubbles.
- Trim and refine:
- Cut away excess fondant with a sharp knife, working slowly around the edges. If you rush, you'll tear it, so take small confident cuts instead of trying to do it in one motion.
- Add the pearl magic:
- Brush a barely damp brush over areas where you want edible pearls to stick, then dust the entire surface with pearl luster dust using a dry brush. Build the shimmer gradually—you can always add more, but you can't take it off.
- Final decorative touches:
- Arrange edible pearls to create a Communion motif like a cross or chalice, pressing them gently into place. If you want extra shine, brush lightly with a mixture of corn syrup and water, but this is optional.
- Let it set:
- Give the cake at least thirty minutes to set before slicing and serving. This allows the fondant to firm up slightly and hold its shape when cut.
 Save to Pinterest
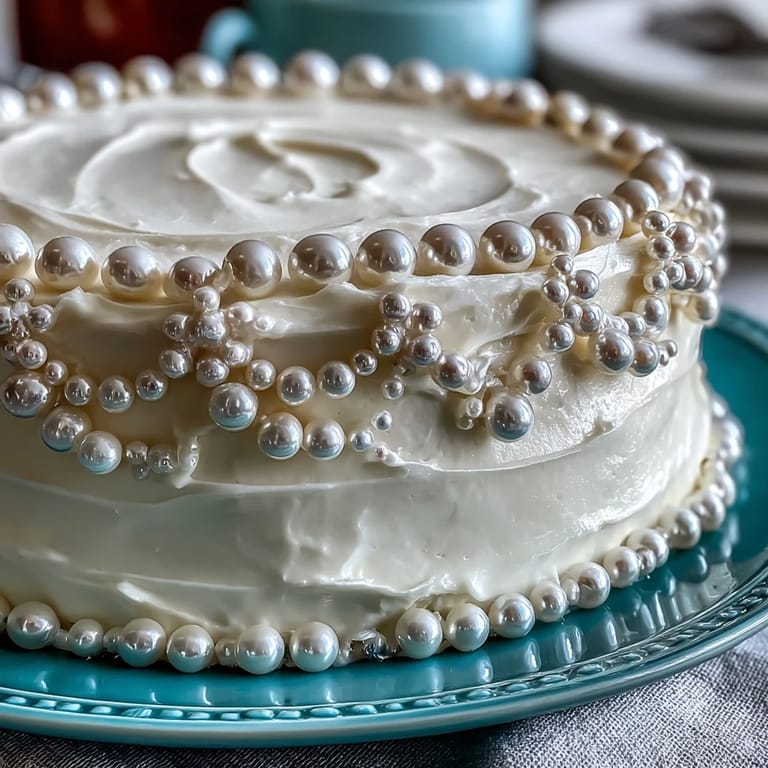
 That Communion reception taught me that a homemade cake with real butter and eggs tastes infinitely better than anything store-bought, and when it's wrapped in pearl fondant, it becomes a centerpiece that guests remember. It's the moment when baking stops being just a task and becomes part of someone's milestone.
Why This Cake Works for Special Occasions
Sheet cakes are often overlooked at celebrations, but they're actually genius for feeding a crowd without looking casual. The size means you get that restaurant-quality presentation while still having plenty to serve, and the fondant gives it an elegance that makes people think you spent way more time than you actually did. Plus, because the cake itself is buttery and tender, people will actually enjoy eating it instead of just picking at it for the sake of tradition.
Making Fondant Work Without Frustration
Fondant intimidated me for years until I realized the key isn't technique—it's temperature and patience. A cool cake with a firm buttercream layer creates the perfect surface, and rolling it out slowly on a powdered-sugar-dusted counter prevents sticking way better than any fancy tool. The moment you stop fighting it and start working with it, fondant becomes almost meditative.
Decorating Like You Know What You're Doing
The pearl dust and edible pearls are what transform this from a nice cake into one that looks professionally decorated, and they're surprisingly forgiving. A soft shimmer across the surface reads as intentional elegance, and placing pearls in a simple pattern—like around the border or in a subtle cross—adds meaning without requiring artistic skill. The beauty is in simplicity, especially for a religious celebration where restraint actually feels more respectful.
- Let your cake cool completely before you do anything to it; warm cake and fondant are enemies.
- Keep pearl luster dust in a small dish and apply with a dry makeup brush for maximum control and minimum mess.
- If fondant tears, a small dab of water on your finger and a gentle smooth motion will heal most minor damage.
 Save to Pinterest
 Making a Communion cake is really about showing up for someone's moment, and this recipe gives you the tools to do that beautifully. Your hands, your kitchen, and a few quality ingredients are all you need to create something that tastes as good as it looks.
Recipe FAQs
- → How do I prevent the cake from drying out?
Ensure not to overbake and cool the cake completely before applying buttercream and fondant to retain moisture.
- → What is the best way to roll out pearl fondant?
Use powdered sugar to dust the surface lightly and roll to about 1/8-inch thickness for easy draping and smooth finish.
- → Can I prepare the cake in advance?
Yes, baking the cake a day ahead and wrapping it tightly before decorating helps flavors meld and eases assembly.
- → How should I store the decorated cake?
Keep it covered in a cool, dry place or refrigerated in an airtight container to maintain texture and decoration integrity.
- → What alternatives can enhance the flavor?
Substituting almond extract for half the vanilla or serving with fresh berries adds complementary notes without overpowering.