 Save to Pinterest
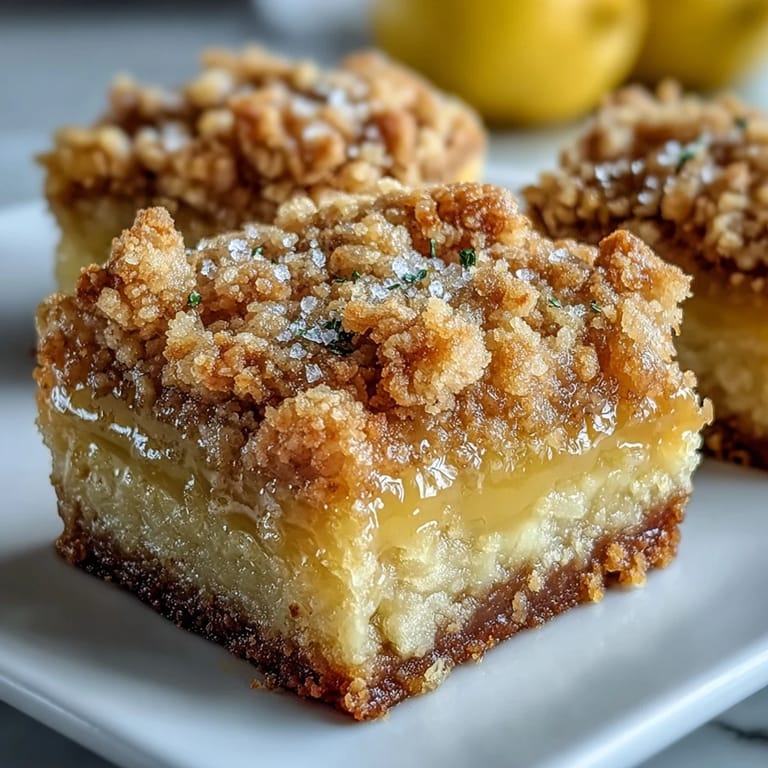
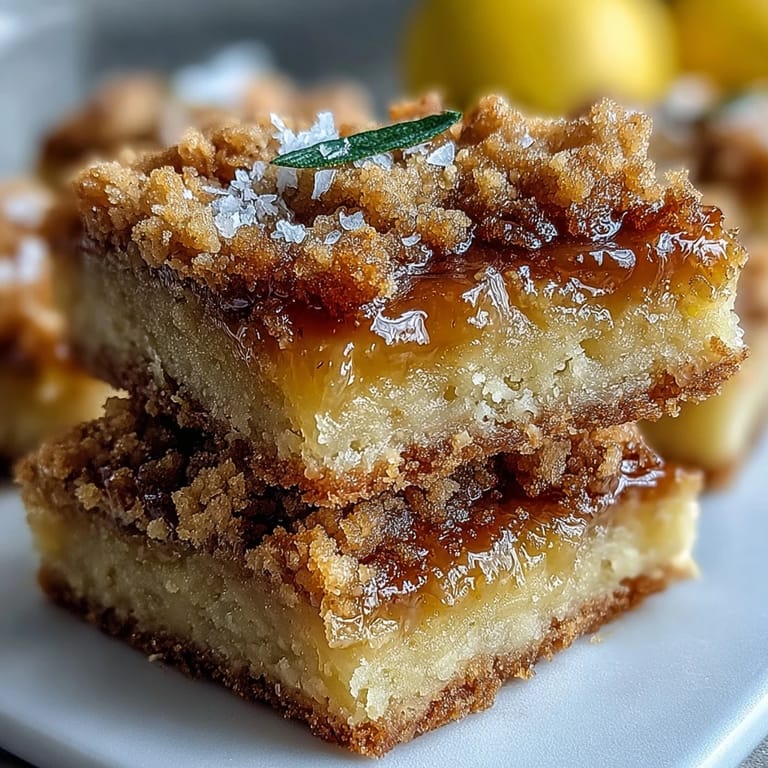
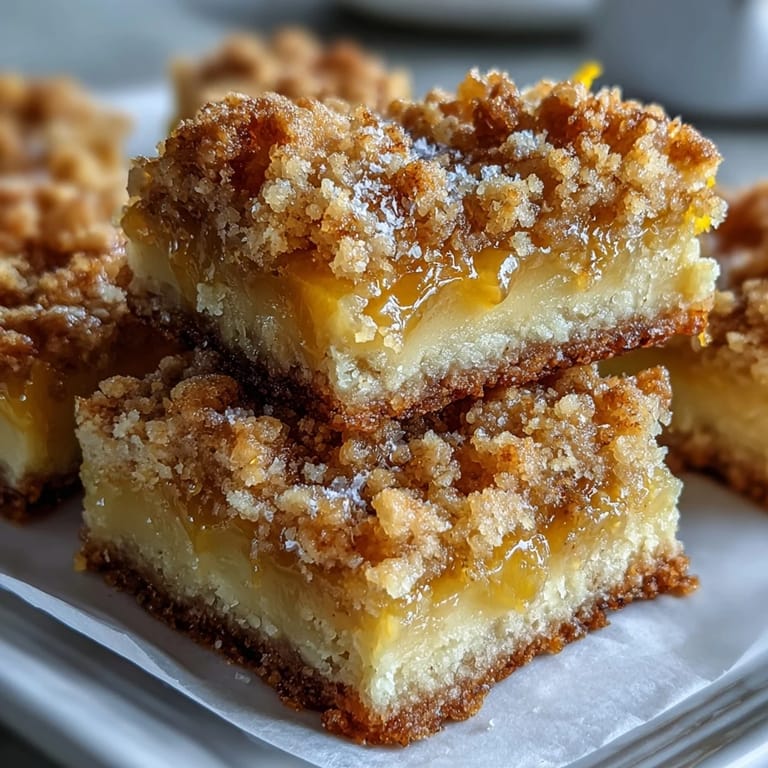
 My kitchen window was wide open one May afternoon when I pulled these bars from the oven, and the smell of butter and lemon drifted straight into the neighbors yard. She knocked twenty minutes later asking what I was baking. That is how I knew this recipe was a keeper. The balance between tart lemon and sweet crumble is so satisfying that even people who claim they do not like lemon desserts come back for seconds.
I brought a pan of these to a potluck once, and they disappeared before the main course was even served. A friend asked if I used some fancy European lemon, but it was just grocery store fruit and a little extra zest. The texture is what surprises people: that buttery crumble on top gives way to a creamy, almost custard like filling underneath. I have made them for birthdays, book clubs, and quiet Sunday mornings when I just wanted something homemade and comforting.
Ingredients
- All-purpose flour: This forms the base of both the crust and the crumb topping, and I have learned that measuring it correctly by spooning it into the cup makes a real difference in texture.
- Granulated sugar: Used in both the crust and filling, it balances the tartness of the lemon without making the bars cloying or too rich.
- Baking powder: A small amount in the crust and filling helps them puff just slightly, giving the bars a tender bite instead of a dense one.
- Salt: Just a pinch sharpens all the other flavors and keeps the sweetness from flattening out on your tongue.
- Unsalted butter, melted: This binds the crumbs together and adds that golden, toasted flavor you smell as soon as the pan goes into the oven.
- Large eggs: They give structure to the lemon filling and help it set into a smooth, sliceable layer that holds its shape when chilled.
- Fresh lemon juice: Bottled juice will not give you the same bright, clean flavor, so I always squeeze lemons right before mixing the filling.
- Lemon zest: This is where the floral, aromatic lemon flavor lives, and I scrape every bit I can from the peel before juicing.
- Powdered sugar, for dusting: Optional, but a light dusting right before serving makes the bars look bakery pretty and adds a tiny hint of extra sweetness.
Tired of Takeout? 🥡
Get 10 meals you can make faster than delivery arrives. Seriously.
One email. No spam. Unsubscribe anytime.
Instructions
- Prep Your Pan:
- Preheat your oven to 350 degrees F and grease a 9x9 inch baking pan, or line it with parchment paper so the bars lift out easily once they are chilled. I always let the paper hang over the edges like little handles.
- Mix the Crumb Base:
- In a medium bowl, stir together 1 cup flour, 1/2 cup sugar, 1/2 teaspoon baking powder, and 1/4 teaspoon salt until evenly combined. Pour in the melted butter and stir until the mixture looks like wet sand and holds together when you pinch it.
- Form the Crust:
- Reserve 1/2 cup of the crumb mixture and set it aside for the topping. Press the rest firmly and evenly into the bottom of your prepared pan, making sure there are no thin spots.
- Bake the Crust:
- Slide the pan into the oven and bake for 10 to 12 minutes, just until the edges start to turn golden. The crust will still look pale in the center, and that is exactly right.
- Make the Lemon Filling:
- While the crust bakes, whisk together the eggs and 1 cup sugar in a large bowl until smooth and slightly frothy. Add the lemon juice, lemon zest, 1/4 cup flour, 1/2 teaspoon baking powder, and a pinch of salt, then whisk until the filling is silky and there are no lumps.
- Assemble the Bars:
- Pull the crust from the oven and immediately pour the lemon filling over the hot surface, spreading it gently if needed. Sprinkle the reserved crumb mixture evenly over the top.
- Bake Until Set:
- Return the pan to the oven and bake for 20 to 25 minutes, until the filling no longer jiggles in the center and the crumb topping is lightly browned. The edges may puff slightly, and that is fine.
- Cool and Chill:
- Let the bars cool in the pan on the counter for at least 1 hour, then transfer to the refrigerator and chill for at least 1 more hour before slicing. Cold bars slice cleanly and taste even better.
- Slice and Serve:
- Once chilled, lift the bars out using the parchment paper if you lined the pan, then cut into 16 squares. Dust with powdered sugar right before serving for a pretty finish.
 Save to Pinterest
 There was an afternoon when I made these bars and forgot to zest the lemon before juicing it, and I ended up scraping the empty halves with a spoon like a maniac. Ever since, I zest first, always. That small habit has saved me more times than I can count. These bars have become my go to whenever I want to share something homemade that feels special but does not require fancy skills or hard to find ingredients.
Storing and Making Ahead
I keep these bars in an airtight container in the refrigerator, and they stay fresh and tangy for up to a week. The crumb topping softens slightly after a day or two, but the flavor actually deepens as the lemon filling settles. If I am bringing them somewhere, I slice them the morning of and dust with powdered sugar right before serving so they look their best. You can also freeze the bars for up to two months, wrapped tightly in plastic wrap and then foil, and thaw them in the fridge overnight.
Adjusting Sweetness and Flavor
The first time I made these, I found them a little too tart for my taste, so I added an extra tablespoon of sugar to the filling and it balanced perfectly. If you like a sharper lemon punch, cut back on the sugar or add an extra squeeze of juice. You can also swap lime juice and zest for a fun twist that tastes almost tropical. The recipe is forgiving, so trust your palate and adjust as you go.
Serving Suggestions
These bars are wonderful on their own, but I have served them with a dollop of whipped cream or a small scoop of vanilla ice cream when I want to make them feel more like a plated dessert. They pair beautifully with hot tea in the afternoon or a chilled glass of Moscato after dinner. I have also packed them in a tin for picnics, and they travel well as long as you keep them cool.
- Serve with fresh berries on the side for extra color and a pop of juicy sweetness.
- Try a thin layer of lemon curd between the crust and filling for an even more intense citrus hit.
- Garnish with a sprig of fresh mint or a twist of lemon peel to make them look elegant on a dessert table.
 Save to Pinterest
 Every time I pull these bars from the fridge and cut into them, I am reminded that the best recipes are the ones that make people ask for seconds without saying a word. I hope these become a staple in your kitchen, too.
Recipe FAQs
- → Why must these bars chill before slicing?
Chilling allows the lemon filling to fully set, which ensures clean cuts and prevents the bars from falling apart. The resting time also lets the flavors deepen and the texture firm up for that perfect tender-yet-structured consistency.
- → Can I use bottled lemon juice?
Fresh lemon juice delivers superior flavor and brightness. Bottled juice lacks the vibrant citrus notes and can taste noticeably artificial. Since lemons are the star ingredient here, fresh makes a meaningful difference in the final result.
- → How do I know when the bars are done baking?
The crumb topping should turn lightly golden brown, and the filling will appear set with only a slight jiggle in the center. The edges may pull away slightly from the pan. Avoid overbaking, which can make the filling rubbery.
- → Can I freeze these bars?
Yes, freeze individual squares wrapped tightly in plastic, then place in a freezer-safe container. They'll keep for up to 3 months. Thaw overnight in the refrigerator before serving, and add powdered sugar dusting just before enjoying.
- → What makes the crust crumbly versus tender?
The ratio of flour to butter creates that signature crumb texture. Melting the butter before mixing coats the flour particles evenly, producing tender, buttery crumbs that hold together when pressed but break apart beautifully when bitten.
- → Why reserve some crust mixture for the topping?
This technique creates two distinct textures—a firm, pressed bottom layer that supports the filling, plus loose, scattered crumbs on top that bake into golden, crunchy nuggets. The contrast between silky lemon filling and buttery crumble makes each bite more interesting.