 Save to Pinterest
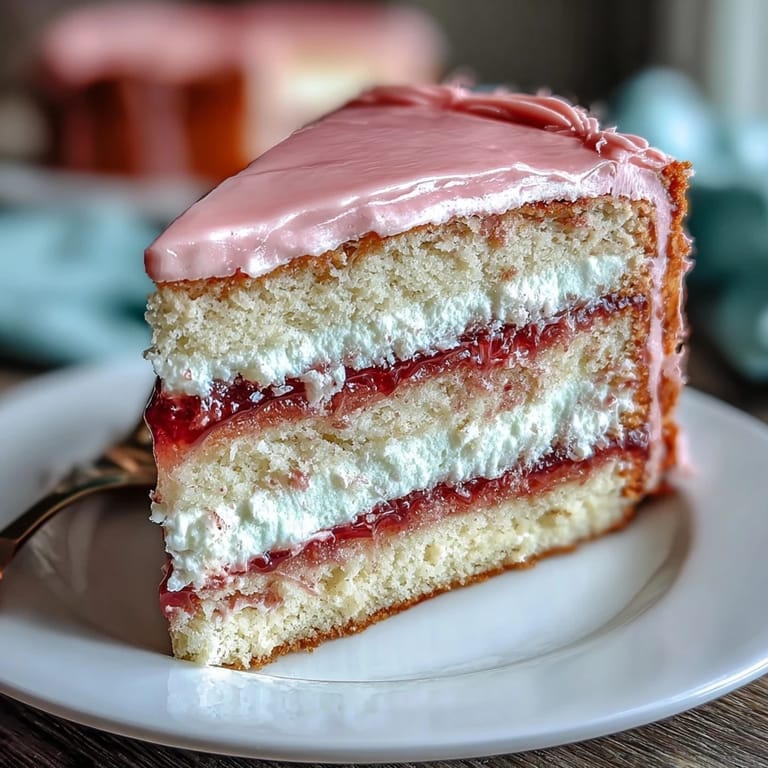
 My friend Sarah texted me a photo of a spring wedding cake she'd seen on Pinterest—all soft pinks melting into buttery yellows like a sunset on a plate. She wanted something like it for her garden party but nothing too fussy, so I decided to crack the code on this ombre magic myself. Turns out, the secret isn't some culinary wizardry, just three simple cake layers tinted in the gentlest pastels and some patient frosting work. The first time I made it, I was terrified the colors would look too bold or the layers would slip everywhere, but they didn't. Now it's become my go-to cake for anyone celebrating something worth dressing up for.
I made this cake for my mom's book club gathering last April, and watching her face light up when she carried it to the table—before anyone even tasted it—told me everything I needed to know about its power. One of her friends, who's usually a tough crowd about desserts, actually asked for the recipe before taking her first bite, which has never happened in the five years I've known her. That moment taught me that sometimes the most meaningful recipes are the ones that make people feel celebrated just by existing on their plate.
Ingredients
- All-purpose flour (3 cups): Use a quality brand and make sure to measure by weight if possible—scooping directly from the bag compacts it and throws off your ratios.
- Baking powder (2½ teaspoons): Check your expiration date before you start; old baking powder won't give you that tender crumb you're after.
- Salt (½ teaspoon): A small pinch that balances the sweetness and makes the vanilla sing without being obvious.
- Unsalted butter (1 cup + 1½ cups for frosting): Room temperature is non-negotiable here—cold butter won't cream properly and your cake will be dense.
- Granulated sugar (2 cups): This is where the cake gets its tender structure, so don't skip it or substitute with brown sugar.
- Large eggs (4): Room temperature eggs incorporate better and create a more stable batter; pull them out of the fridge 30 minutes before baking.
- Pure vanilla extract (1 tbsp + 2 tsp): The real thing makes a noticeable difference in flavor depth compared to imitation.
- Whole milk (1 cup): Also bring this to room temperature—it creates a smoother batter when alternated with the dry ingredients.
- Gel food coloring (pink and yellow): Gel works better than liquid because it doesn't thin out your batter like water-based dyes do.
- Powdered sugar for frosting (5 cups, sifted): Sift it before measuring to avoid lumps that will texture your buttercream.
- Milk or heavy cream for frosting (3–4 tablespoons): This adjusts the consistency—start with 3 and add more if your frosting feels too stiff.
Tired of Takeout? 🥡
Get 10 meals you can make faster than delivery arrives. Seriously.
One email. No spam. Unsubscribe anytime.
Instructions
- Get Your Pans Ready:
- Preheat your oven to 350°F and grease three 8-inch round pans generously, then line the bottoms with parchment paper—this one extra step means your cakes will slide right out without sticking. It takes maybe two minutes but saves you from the frustration of a cracked layer.
- Mix Your Dry Ingredients:
- Whisk flour, baking powder, and salt in a medium bowl and set aside. This distributes the leavening evenly so you don't end up with dense pockets.
- Cream the Butter and Sugar:
- In a large bowl, beat room-temperature butter and sugar together on medium speed for 3–4 minutes until the mixture is pale, fluffy, and looks almost like frosting. You'll hear the mixer change pitch when it's ready, and visually it should lighten by at least a shade.
- Add Eggs One at a Time:
- Beat in each egg fully before adding the next, then stir in vanilla extract. This patience here prevents the batter from breaking and ensures a fine crumb structure.
- Alternate Dry and Wet:
- Add the flour mixture and milk to the butter mixture in three additions, starting and ending with flour, and mix just until you don't see streaks of flour—overmixing develops gluten and toughens the cake. Think of this as folding together gently, not beating it.
- Divide and Color:
- Split the batter evenly into three bowls and tint one with a tiny amount of pink gel coloring and another with pale yellow; leave the third plain or add a drop of both for a soft peach if you want a smoother ombre transition. Start with less color than you think you need—you can always add more, but you can't take it out.
- Bake the Layers:
- Pour each batter into its prepared pan and smooth the tops gently, then bake for 22–26 minutes until a toothpick inserted in the center comes out clean. Overbaking will dry them out, so start checking at 20 minutes.
- Cool Properly:
- Let the cakes sit in their pans for 10 minutes—this gives them time to set and shrink slightly from the sides—then turn them out onto wire racks to cool completely. Frosting warm cake is a battle you don't want to fight.
- Make Your Frosting:
- Beat room-temperature butter on medium-high speed until creamy, then gradually add sifted powdered sugar, vanilla, salt, and milk, beating until light and fluffy. If it feels too thick, add milk a teaspoon at a time until you reach a spreadable consistency.
- Tint the Frosting:
- Divide the frosting into three bowls and tint one pale pink, one pale yellow, and leave one plain. Again, go light with the color—you want these to feel soft and spring-like, not neon.
- Assemble the Cake:
- Level your cake layers if needed with a serrated knife, then place the yellow layer on your serving plate and spread it with yellow frosting. Top with the plain or peach layer and spread with plain frosting, then top with the pink layer and crown it with pink frosting.
- Create the Ombre Effect:
- Use your remaining frosting to cover the sides, blending yellow at the base up to pink at the top by applying colors in sections and smoothing them together with an offset spatula or cake scraper. Work slowly here—you can always add more frosting to smooth things out, but rushing makes it look messy.
- Final Touches:
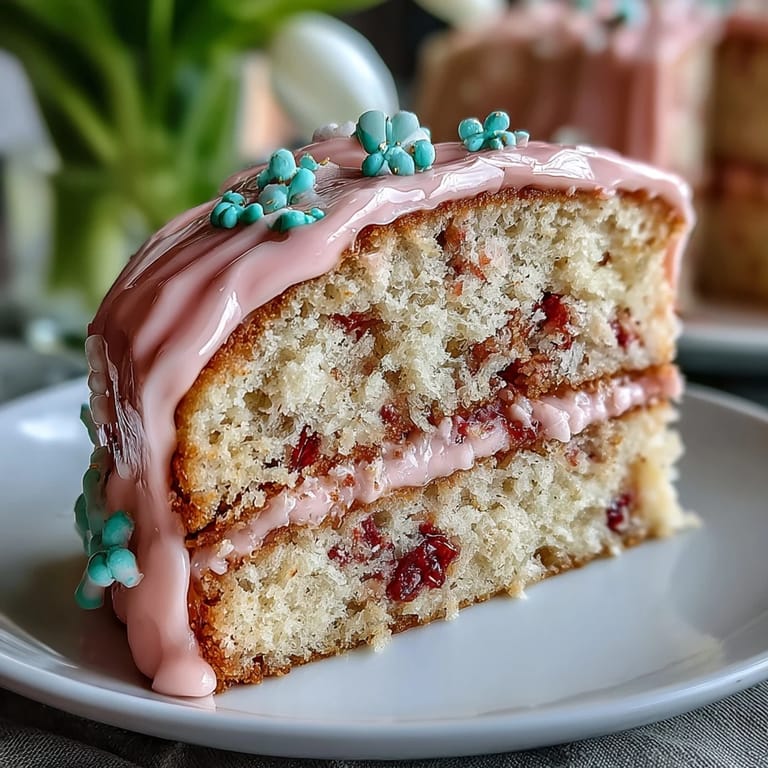
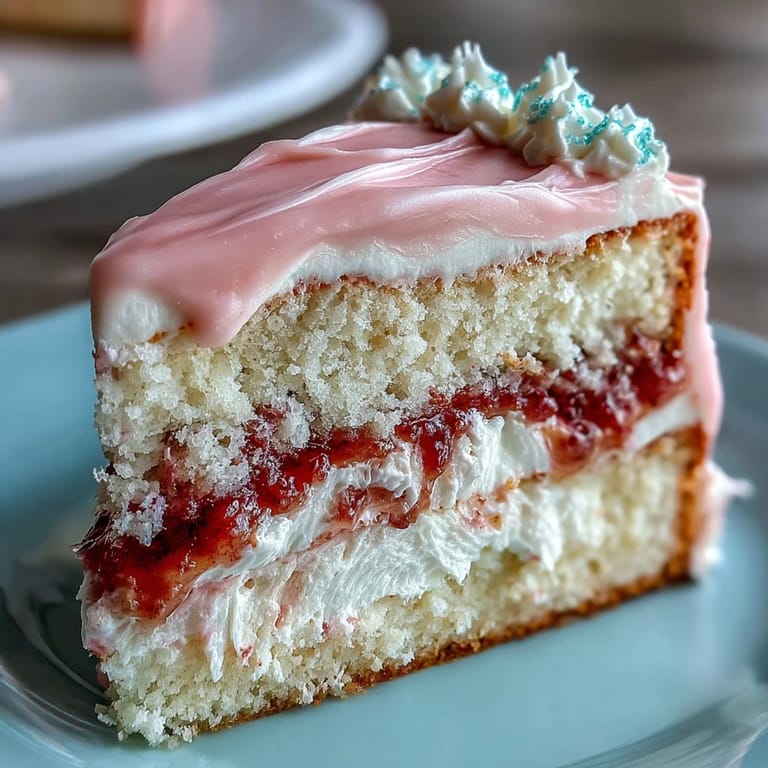
- Decorate with pastel sprinkles, edible flowers, or fresh berries, then chill for 30 minutes before slicing. This chill time sets the frosting and makes cutting cleaner, giving you those Instagram-worthy slices.
 Save to Pinterest
 My neighbor brought over her daughter after school one afternoon and found me frosting this cake with the kitchen smelling like vanilla and butter. The little girl watched me blend the colors and asked if I was painting a cake, and honestly, that's exactly what it felt like—each swipe of the spatula felt creative and almost meditative. When she came back the next week asking if I was making another painted cake, I realized that this recipe had become something I make not just for celebration, but because the process itself brings a little lightness to an ordinary day.
Choosing Your Colors Wisely
The magic of this cake lives in the restraint of the color choices. I've seen people go bold with electric pink and sunshine yellow, and while those are beautiful, the whole appeal of an ombre cake is that it whispers rather than shouts. Gel coloring gives you the control to keep things pastel and elegant—just a toothpick dab of color goes a long way. If you're nervous about the gradient effect, remember that your frosting swirls don't have to be perfect; nature's ombres aren't perfectly blended either, and neither do yours.
Timing and Temperature Matter More Than You'd Think
The first time I made this cake, I skipped the step of bringing ingredients to room temperature because I was in a hurry, and the result was noticeably denser than my second attempt. Room temperature butter creams faster and more fully, incorporating air that makes the cake light. Room temperature eggs emulsify better, creating a smoother batter that bakes evenly. It sounds like a small thing, but these 30 minutes of patience at the start pay off in every bite and every layer.
Storage and Serving Secrets
This cake actually improves slightly after a day of sitting because the flavors meld together and the frosting becomes more stable. Keep it covered at room temperature if you're eating it within a day, but refrigerate it if you've made it ahead—it keeps for up to four days in the fridge and actually slices even cleaner when it's chilled. If you're taking it somewhere, assemble it the night before and keep it cool, then let it sit at room temperature for about 15 minutes before serving so the cake tastes tender instead of cold and dense.
- Don't skip the chill time before cutting—cold frosting holds sharp edges that look bakery-perfect.
- If you need to transport it, invest in a cake carrier or carefully wrap it in plastic wrap to protect your hard work.
- Leftover frosting freezes beautifully for up to two months if you want to make another cake later.
 Save to Pinterest
 Making this cake feels like creating art that you get to eat, and every time I do, I feel a little bit of that anticipation from Sarah's original text message—that moment of seeing something beautiful and wanting to make it real. You've got this.
Recipe FAQs
- → How do I achieve the pastel ombre effect?
Divide the batter into three portions and tint each with varying amounts of pink and yellow gel coloring to create soft, gradient layers.
- → What type of pans should I use?
Use three 8-inch round cake pans lined with parchment paper for even baking and easy removal.
- → Can I substitute milk in the batter?
Whole milk is recommended for richness, but buttermilk can be used for a tangier flavor and tender crumb.
- → How to make the buttercream silky and smooth?
Beat unsalted butter until creamy, then gradually add sifted powdered sugar with vanilla, a pinch of salt, and milk or cream, adjusting for desired consistency.
- → What are some decoration tips for this cake?
Enhance with pastel sprinkles, edible flowers, or keep it clean and simple to highlight the ombre effect.
- → How long should the cake chill before slicing?
Chill for at least 30 minutes to ensure cleaner slices and firmer frosting.